Part 3: Evacuation Orders

- Chapter 2, with Blind Sally and nine-gear crow, co-op
- Chapter 2, with nine-gear crow, ChaosArgate, and Jobbo_Fett, singleplayer
- Chapter 2, no commentary, singleplayer


Here we are, back at the ending of Killzone 2. Pyrrhus City has been nuked, nearly all of the ISA's ground forces on Helghan have been eradicated, and Visari is dead at Rico Velasquez's hands.
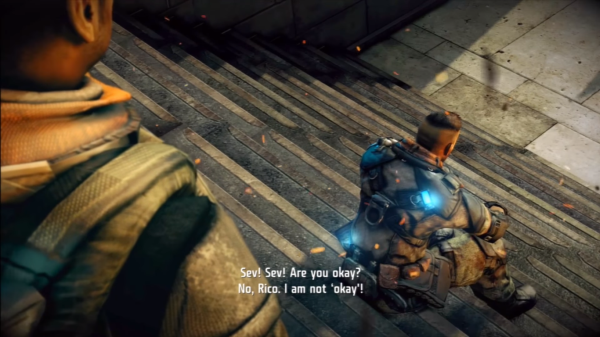
No, Rico, nothing is okay.
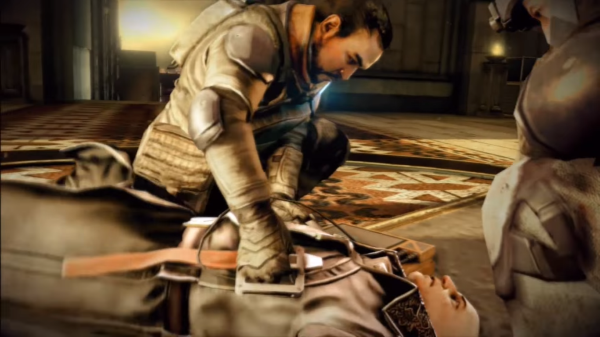
For all those Helghast fanboys and girls who hoped that Visari would survive his gunshot wounds, this moment is for you. Scolar Visari is dead. ISA medics could not resuscitate him and even declared his time of death.
 IT'S OFFICIAL: AUTARCH SCOLAR VISARI IS DEAD
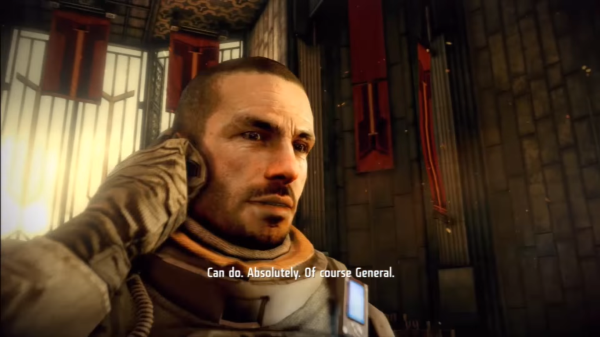
This scene very clearly shows off Narville's role in the story: he's the connection between the ISA grunts on the ground and the commanders who are overseeing the battlefield. As one of those grunts on the ground, this gives Narville a privileged position—a unique point of view that the rest of the ISA soldiers, including Sevchenko and Velasquez, aren't privy to. This is why he's the Captain. This is why the ISA need to follow his orders. He knows things they don't and can act accordingly.
This may very well seem obvious and, well, it should be. I'm emphasizing it, though, as it's about to become a critical plot point. (Believe it or not).
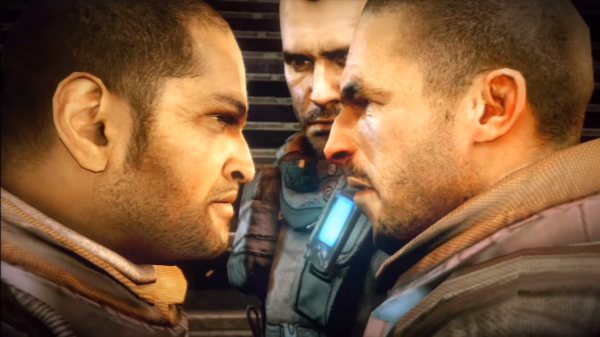
The game also gives us a brief taste of what the relationship dynamics are going to be for Killzone 3: Rico and Narville are beyond pissed off at each other, Sevchenko is caught between the power struggle of these two fuck-off massive egos, and Natko has been dropped from the plot with such speed that he has literally disintegrated from the timeline and no longer exists.
It's going to be fun!

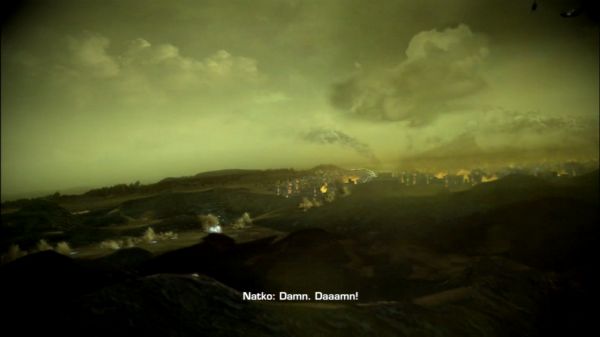
Of note, the ISA evac zone is within the blast crater. I mean, I guess that makes sense. The Helghan armada is bearing down upon the remaining ISA cruisers so they take cover in the fog of war created by the blast to protect themselves from destruction. Better than just hanging out in the middle of the sky, I suppose. Makes them less obvious targets. And yeah, that's a nuclear mushroom cloud, but Red Dust is a futuristic space nuke. Most of the radiation from the initial blast has already dissipated. That's cloud is probably harmless by now.
Which is good, because we're going to drive right into it.

I also want to address a mistake I made in the commentary of this video. Although the generators appear to be glowing green, the arc energy they fire is not. It's just regular petrusite. In fact, I don't think we're supposed to identify the green generator glow as irradiated petrusite at all and wonder if it was a colouring error on the part of the animators. It's been a while since the Killzone 2 LP, but as far as in-universe timelines are concerned, Pyrrhus has only JUST been bombed. No one's had a chance to study irradiated petrusite yet. (Though we know the timeline in this game jumps six months into the future, so hey).

Anyways, we're going back into Pyrrhus. Last time we were there it was already being bombed to pieces, but it's reached a whole new level of destruction. Before it looked like a warzone, but now it's been absolutely devastated. Not a lot to note here. We go through some buildings and see some ruined atriums and paintings—but it's not really anything we haven't seen before.creatures and vehicles from Killzone 2 reappear and we see some concept art as artwork in the background, but nothing really important is going on besides the fact that it's in ruins.
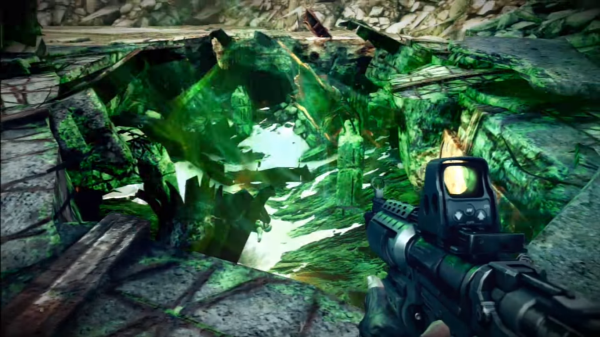
We do come across irradiated petrusite. Now this is new. It was hinted at in the second game when Templar crashed the New Sun into the petrusite grid and blew it up:
(The image here doesn't totally do it justice, but in the cutscene the explosive blasts are a greenish colour instead of the bluish-white hue we've come to expect with petrusite).

Once again, petrusite plays the role as the B Plot to the main story. Right now it's not important that we delve into the specifics of irradiated petrusite, it's important that we realize that a certain opportunistic someone has already sent in soldiers to collect samples for research. Note the armour: they're the same new Helghast soldiers we saw in Stahl Arms in the first chapter. The soldiers work for Stahl.
We also learn that, for as volatile as petrusite is, irradiated petrusite is even more volatile. The electrical currents will grab onto anything that moves quickly enough. Something about kinetic energy? Who knows. Make no sudden movements around irradiated petrusite, though.

Returning to Alpha Squad and Avenger Convoy, we see that Narville has managed to regroup a number of soldiers back to the cause. We have a number of vehicles as well. A bunch of them returning from the previous game and some new ones. They're just in time for us to get pelted by Helghast gunfire. In fact, this gets brought up—
And here it is—Killzone 3 is turning a blinding spotlight on the different points of view on a battlefield. What we have is different people with different views of the battlefield who all have different opinions, but not all of them have the same information. This is going to become a core conceit of this game and will lead to some interesting storytelling.
But first, because I want to make sure I'm being clear about this, here is a diagram demonstrating my point:

Okay, so at the very top of the diagram is the ISA general that was talking to Narville. We don't know who they are and honestly it doesn't really matter. They aren't really in the game other than the fact that they give orders to Narville who then passes on the orders to his troops. The general sits at the top because he's in charge. Also, because they have the greatest view of the battlefield. They have the most intel. They have to make decisions that impact hundreds or thousands of soldiers, decisions that will impact the very tide of war. They're playing Risk while Sev and Rico play Checkers. The general is also literally above everyone because they are sitting in an ISA cruiser floating about the planet's surface.
Narville sits in the middle. He's the bridge between the guys on the ground and the general in the sky. His of the battlefield is limited by the fact that he is on the ground with Avenger Convoy and Alpha Squad. However, thanks to his connection with the generals, he has a greater understanding of the battlefield (and thus a broader point of view).
Sev and Rico are wholly grunts on the ground. They focus on what is in front of them because that's what they need to do to survive. There seems to be a bit of push and pull in the storyline between a great overall narrative and then the gameplay segments which focus on just shooting and surviving. When we play as Sevchenko, we are caught up in his world. He doesn't really know what's going on other than the fact that Helghast are running at him trying to kill him. He isn't aware of what is over the horizon, he's working with what limited information he has—what information Narville is able to share with him.
Which brings me to what's going on here. In the very beginning of the game, Narville clearly got some orders from the generals to get the fuck out of there. What Narville knows is that the ISA invasion force has been decimated. Aside from a few scattered pockets on the ground, his Avenger Convoy is the only functional spearhead on the planet. Backup from the ISA cruisers is impossible because there's only three left and they're having a helluva time holding off the approaching Helghan armada. By then end of the video, Narville reveals to us that at least 12 Helghast cruisers have pinpointed the location of the remaining ISA ships and are closing in. Time is running out, and fast. Narville knows that if they don't make a beeline to those cruisers, there's a very real possibility that none of the soldiers in his convoy are going home, including himself, Sev,
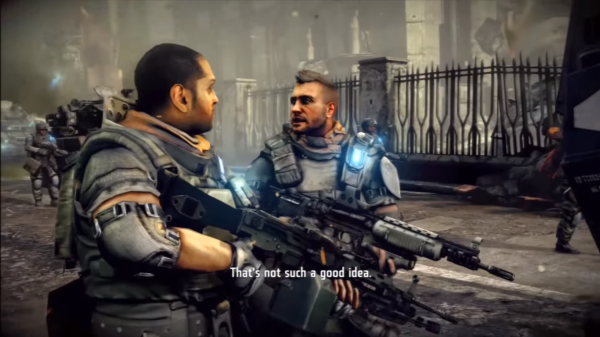
Sev and Rico don't really know all of this. What they know is that Narville is rushing his forces across the ground, forcing them to spread themselves thin while they work their way down the highway through Helghast occupied Pyrrhus. They point out that it's not such a good idea to rush as, after all, it'll allow the Helghast to more easily pick them off. This is true and, as we see, the Helghast do indeed inflict pretty heavy casualties on the convoy. What they don't realize is that there really isn't time to slow down and consolidate their forces. If they did that, the ISA cruisers would either get destroyed waiting for them or be forced to flee without them.
So we have a situation where Narville is correct in rushing the ISA forces despite opening them up to greater casualties, and where Sev and Rico are correct in realizing that waiting for the ISA forces to regroup will allow them to better defend against a Helghast attack. They're caught between a rock and a hard place. While neither choice is ideal, it's interesting how Guerrilla chooses to present it. Since you're playing as Sev, the game seems to portray his option as the "correct" one. Since Narville is a bit displaced from the main character (Rico spends way more time with Sev than Narville does), his choice seems to get portrayed as the "incorrect" one. I'm still not sure if this was a conscious decision, but perhaps we can decide as a thread as the game goes on.


If ever there was a case to be made for Killzone 3 having an unsung MVP, it’s definitely Corporal Hooper. Hooper is Narville’s right-hand man throughout Killzone 3, his logistics and procurement officer. Crow compares him in the video to Corporal Walter “Radar” O’Reilly from M*A*S*H, who filled a similar role as being the hyper-competent yet quietly understated workhorse character who keeps everything running smoothly for our outrageous heroes.
Alongside Sev, Hooper is one of the few Capital-G “Good” soldiers left in the ISA’s ranks. He has a specific job to do, and he does it well, without running his goddamn mouth off about it or expecting his ass to be kissed with validation like Rico constantly does.

New gameplay summed up in a gif:

You can now slide and there are brutal melee kills.
Okay, so if you're sprinting and you press the crouch button, you will start sliding. If you slide into cover, you will automatically snap against the wall. It's useful for getting to safety quickly. If you do this while charging an enemy, you will slide tackle them, knocking them to the ground. That part is fucking awesome!! Anyways, little addition to gameplay, but huge fun. Allows you to do some fun things in combat.
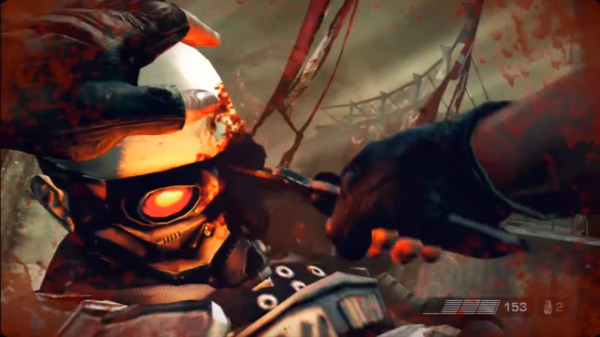
Brutal melee is a bit of a step back from the Rambo knife kill thing we had in Killzone 2 but not quite as terrible as the weird damage threshold to trigger a canned animation kill of Killzone 1. You can melee people to stagger them and hurt them—even kill them. But if they are standing in the right position or are near the correct environmental object to activate the trigger, then you can do a canned "Brutal Melee" animation where Sevchenko just straight up murders a dude with his bare hands.
This YouTube video is a great summation of what the Brutal Melee mechanic entails: https://www.youtube.com/watch?v=NPJj2mvYMHE
Basically, it's a lot of knives through eyes. Now, it's not as effective as the Rambo knife, since you can't use it to absolutely trivialize sections of the campaign even on the hardest difficulty, but it works and is satisfying, so there's that.

More returning vehicles. We see various Helghast cruisers, the retrofitted Heghast mining tank, the ISA APC, the ISA tank, and the Exo suit. There's also a new one that gets driven in the cutscenes:
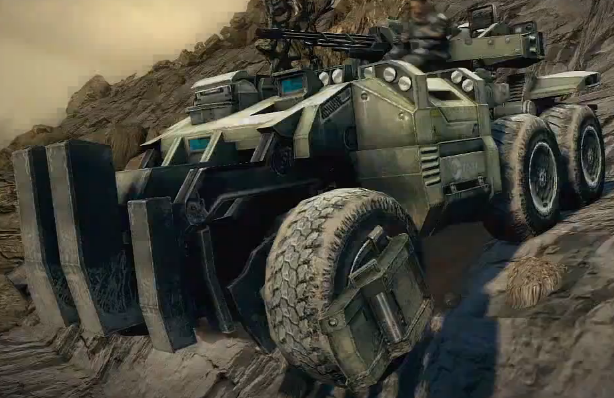
HAMR IFV
The HAMR has the firepower of a light tank but is waaaay faster an maneuverable. It functions as an inbetween from the ISA tank and the ISA jeep that we saw used in the previous game. It's armed with a standard ISA .50 caliber M224 HOMAG machine gun and a high-explosive-armor-piercing 35mm autocannon. Not the most powerful ordnance on the battlefield, but it has an extremely high rate of fire that lets it literally hammer targets to dust. Get it? "Hammer"?


More weapons return, notably the Helghast submachine gun. More importantly, we get a new gun:
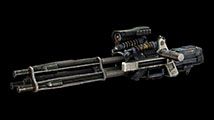
StA-62 Minigun
Thank you, Stahl, you beautiful bastard, for this blessing of the single greatest gun in the game! When mounted, the Minigun has infinite bullets. When unmounted (heck yes, Killzone 3, bless you for letting us unmount them!) it only has 300 rounds. Unfortunately, it burns through those rounds incredibly quickly. The upside to this is that any enemy caught in the crossfire dies basically instantly—also armoured Helghast vehicles are also very susceptible (see: the numerous Helghast Dropships crow and I liquidate). Fortunately, any ammo box found in the gameworld will replenish a Minigun's ammunition to max. Also, ammo boxes never run out of ammo. So basically, no matter what difficulty you play this game on, if you find a Minigun, you better damn well grab it. It's the single most powerful and most useful gun in the game, full stop.

Ruined Pyrrhus concept art:
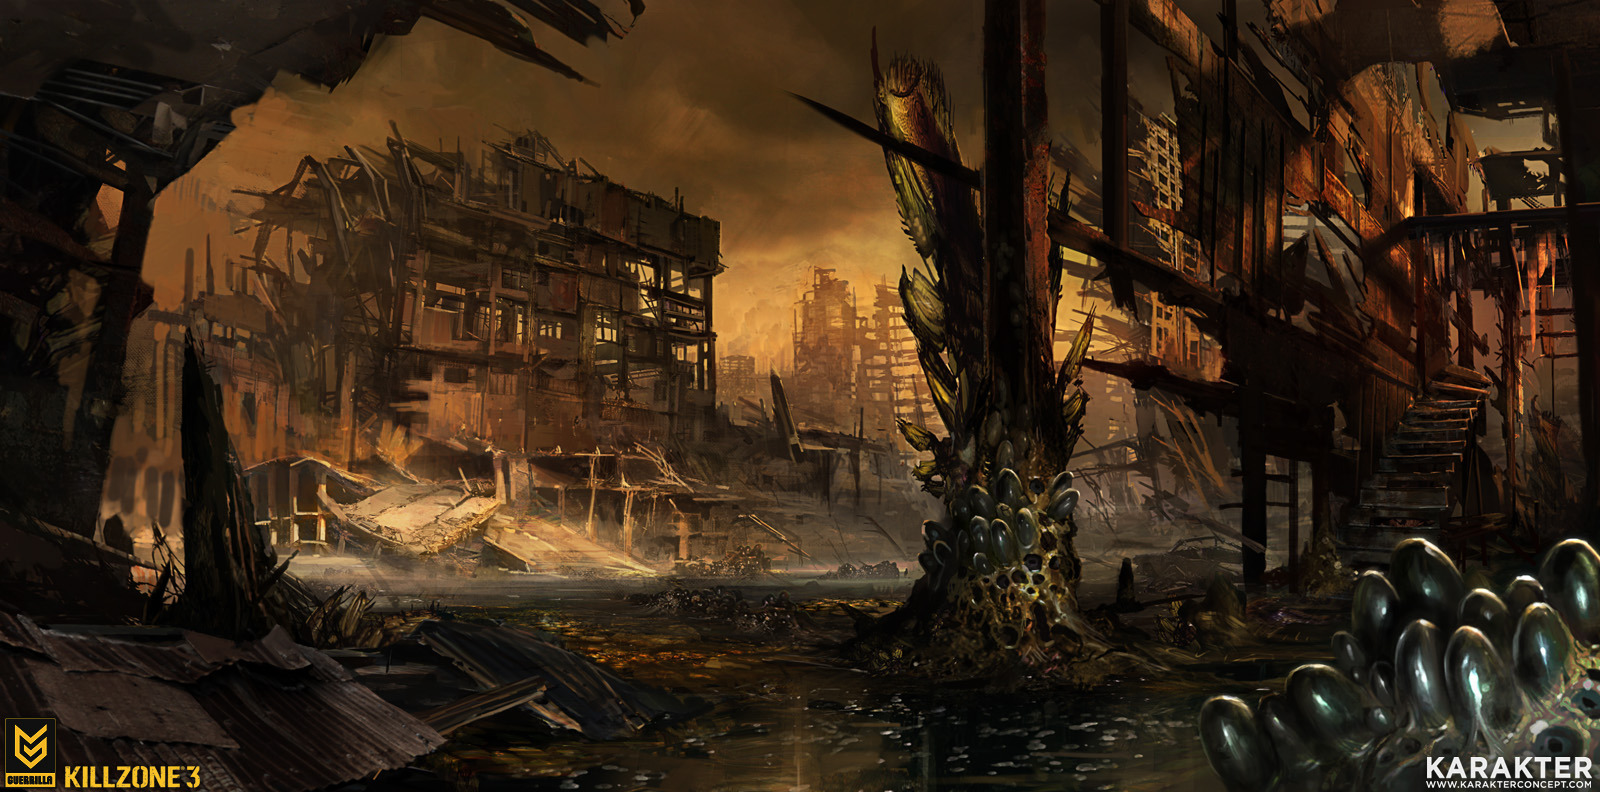
That nuke, though


Note: ISA Crusiers can be seen hovering near the mushroom cloud.